Project Example: Step By Step
Many people are updating their home by replacing their old windows. Not only is the view outside clearer but you can save money on heating bills by replacing the old drafty windows you have now.
Here is a step by step window replacement series. The job included removing old siding and windows, repairing any framing and sheeting that has been damaged by rot, and addressing any waterproofing issues. What I didn't realize was the extent of the rot that had occurred over the past twenty five or so years.
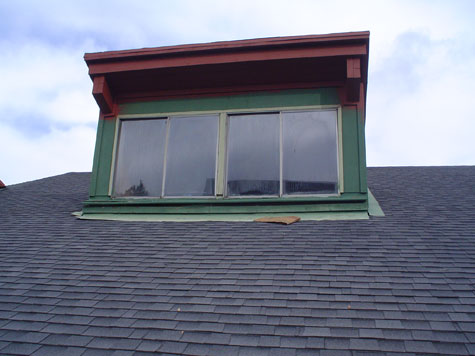 1 Before photo of the existing dormer, these old aluminum windows are really good at conducting hot and cold air between the inside and outside.
.jpg) 2 A close up of the windows, moisture has seeped in between the pains of glass. I am not touching the fasica or soffit so it was painted prior to working on the dormer.
2 A close up of the windows, moisture has seeped in between the pains of glass. I am not touching the fasica or soffit so it was painted prior to working on the dormer.
.jpg) 3 Another close up.
3 Another close up.
.jpg) 4 Another close up.
4 Another close up.
.jpg) 5 The start of demolition. The black board above the window is celotex sheeting which is a very popular low cost building product that is found on a lot of track homes. Although it has very minimal insulation qualities and is water proof it has absolutely no structural proprieties.
5 The start of demolition. The black board above the window is celotex sheeting which is a very popular low cost building product that is found on a lot of track homes. Although it has very minimal insulation qualities and is water proof it has absolutely no structural proprieties.
.jpg) 6 Demolition.
6 Demolition.
.jpg) 7 The window sill has water damage and rot.
7 The window sill has water damage and rot.
.jpg) 8 Another view of the sill.
8 Another view of the sill.
.jpg) 9 The window sill has been reframed and we are just starting to resheet the dormer with 1/2 inch plywood. A plastic vapor barrier has been installed between the framing and interior.
9 The window sill has been reframed and we are just starting to resheet the dormer with 1/2 inch plywood. A plastic vapor barrier has been installed between the framing and interior.
.jpg) 10 The dormer completely resheeted, it's almost ready for windows.
10 The dormer completely resheeted, it's almost ready for windows.
.jpg) 12 Bituthene has been installed over top of the sill plate where the window sits nd on the face of the dormer. Bituthene is rubber membrane with adhesive on the back, it sticks to plywood and creates a water tight seal.
12 Bituthene has been installed over top of the sill plate where the window sits nd on the face of the dormer. Bituthene is rubber membrane with adhesive on the back, it sticks to plywood and creates a water tight seal.
.jpg) 13 Sealing the side and corner of the dormer.
13 Sealing the side and corner of the dormer.
 14 A close up of the dormer with board and batten cedar siding.
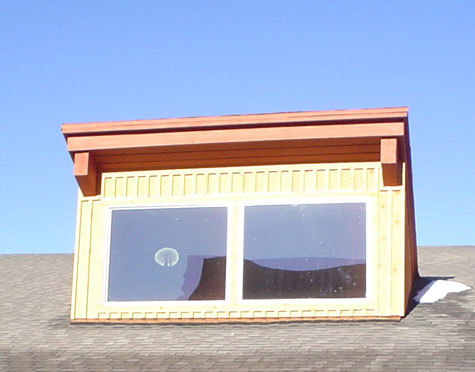
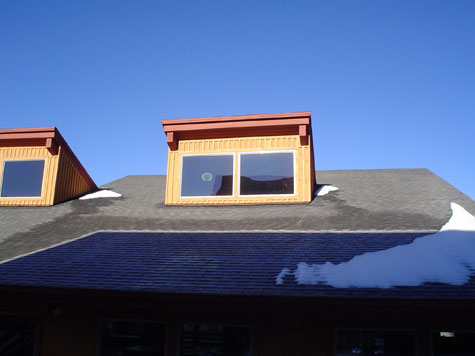 15 The dormer from a distance, finished.
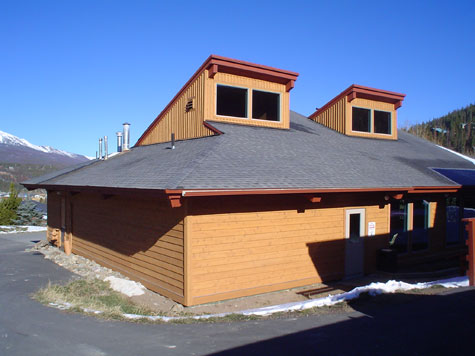 16 Both dormers from a distance finished.